How to wrap a present doesn’t have to feel like solving a Rubik’s Cube while blindfolded. Honestly, once you know a couple of simple tricks, you’ll turn out gifts that look straight out of a boutique—and you’ll actually enjoy the process. Ready to ditch the sad gift bag habit forever? Let’s dive in.
Why Learning How to Wrap a Present Actually Matters
Think about the last time you received a beautifully wrapped gift. Didn’t it feel a thousand times more special before you even tore the paper? That’s the magic we’re chasing. Mastering how to wrap a present isn’t just about hiding what’s inside—it’s about building anticipation, showing you care, and yeah, flexing a little creativity. Plus, it saves money compared to paying someone at the mall kiosk $8 a gift.
Essential Supplies You Need Before Learning How to Wrap a Present
Before we roll up our sleeves, grab these basics:
- Quality wrapping paper (thicker is better—trust me)
- Double-sided tape (the secret weapon of crisp edges)
- Sharp scissors
- Ribbon, twine, or washi tape
- Gift tags or blank cardstock
- A flat surface (your dining table works perfectly)
- Optional but awesome: bone folder (for razor-sharp creases)
Pro tip: Keep everything in a dedicated “gift-wrapping station” box. Future-you will high-five present-you.
Step-by-Step Guide: How to Wrap a Present (The Classic Box Method)
Step 1: Measure Your Paper Like a Ninja
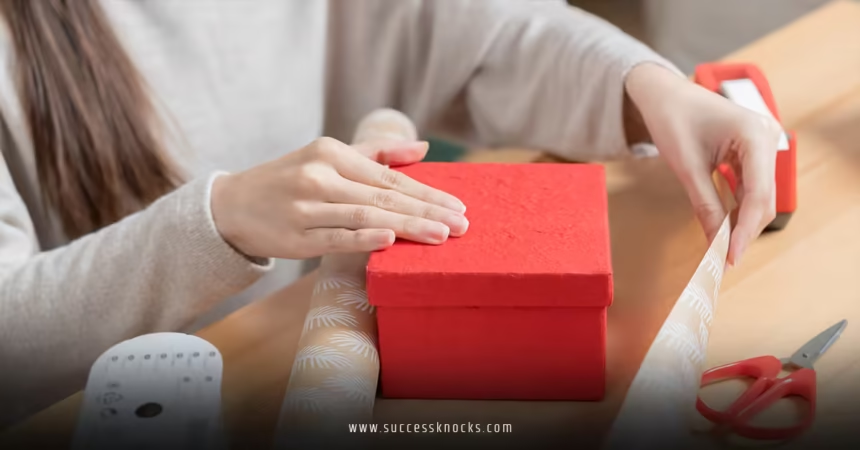
Place your gift in the center of the paper (wrong side up). Pull the paper up on the long sides—you want enough to cover the box completely with about 2-3 inches of overlap at the top. For width, you need enough paper to come up the sides and overlap by roughly the height of the box. Too much paper? You’ll get bulky folds. Too little? Disaster. When in doubt, err on the side of extra—you can always trim.
Step 2: Make the First Clean Cut
Cut the paper straight using the box edge as a guide. Nothing screams “I tried” like jagged edges. If your scissors are dull, stop right now and sharpen them. Dull scissors are the enemy of anyone learning how to wrap a present beautifully.
Step 3: The Center Seam (This Is Where Magic Happens)
Bring both long edges together in the middle. Create a crisp crease along the box edge first, then secure with double-sided tape right along that crease. One continuous piece of tape = zero visible lines. Single-sided tape? You’ll see it, and it looks cheap.
Step 4: Tackle the Ends Like You Mean It
Here’s where most people panic. Relax. Push the sides in to create four 45-degree triangles (two on top, two on bottom). Fold the top flap down—it should create a clean angled line. Fold the bottom flap up and over, securing with tape. Repeat on the other side. Boom—department store corners.
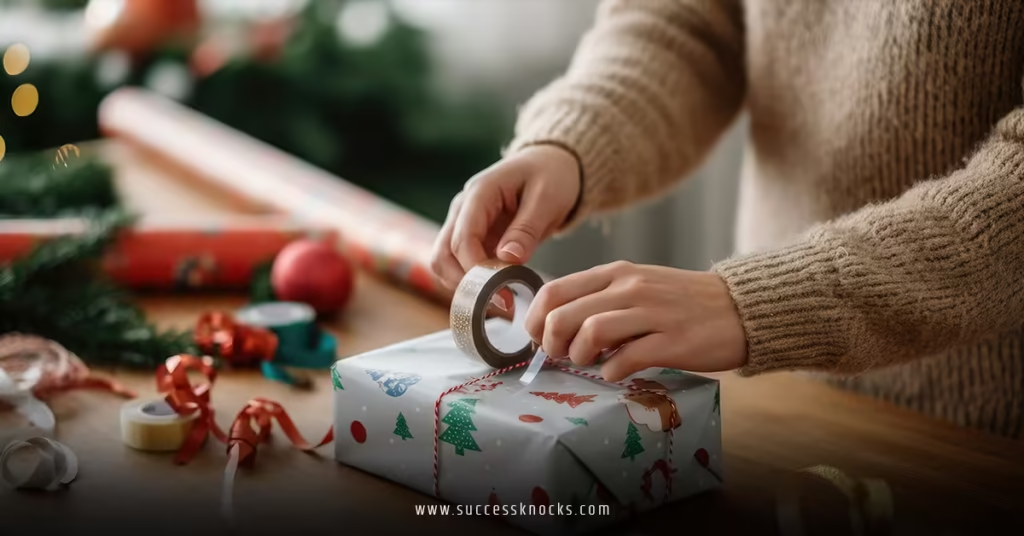
Step 5: Final Touches That Scream “I’m Thoughtful”
Add ribbon. My favorite trick? Cut a length long enough to wrap around the gift both ways with extra for a bow. Use thin ribbon doubled up for volume. Want to level up? Add fresh greenery, a cinnamon stick, or a tiny ornament.
How to Wrap a Present That’s Not a Perfect Box (The Weird Shapes Survival Guide)
Cylindrical Gifts (Wine Bottles, Candles, Posters)
Lay the gift diagonally on the paper. Roll it like a burrito, secure the tube with tape, then twist both ends like a candy wrapper. Tie with ribbon or twine. Instant elegance.
Soft Gifts (Sweaters, Stuffed Animals)
The “gift bag cheat” without the bag: Place the item in the center, pull paper up like a flower, gather at the top, and secure with ribbon. Looks intentional and gorgeous.
Super Odd Shapes
Use the double-paper method or fabric wrapping (furoshiki style). Nobody expects a blender to look perfect—lean into the charm.
Advanced Techniques Once You’ve Mastered How to Wrap a Present
The Japanese Pleat Method (Mind-Blowing Corners)
Instead of the standard triangle fold, create multiple accordion pleats on the ends. It’s next-level and surprisingly easy once you watch it once. Your friends will lose their minds.
Double-Layer Wrapping
Wrap in tissue first, then a contrasting outer paper. When they tear the outer layer, they get a second “wow” moment.
Fabric Wrapping (Eco-Friendly and Reusable)
Furoshiki is the Japanese art of fabric wrapping. A square scarf becomes a stunning reusable wrap. Bonus: zero waste.
Common Mistakes People Make When Learning How to Wrap a Present (And How to Avoid Them)
- Using cheap dollar-store paper that tears (invest a little—it’s worth it)
- Too much tape showing (double-sided is life-changing)
- Not creasing edges (run a bone folder or your fingernail along every fold)
- Forgetting the gift tag until the end (attach it BEFORE the bow—rookie move)
Creative Themes to Make Your Wrapped Presents Instagram-Worthy
- Minimalist kraft paper + black ribbon + dried orange slices
- Vintage book pages + red baker’s twine
- Newspaper + bright washi tape for a quirky vibe
- Chalkboard paper where guests write messages directly on the gift
How to Wrap a Present When You’re Short on Time (5-Minute Hacks)
- Use a gift bag (but elevate it with tissue paper “fireworks” exploding out the top)
- Wrap in a pretty tea towel (two gifts in one!)
- The “fancy envelope” method for small items—just fold paper like an envelope and seal with a sticker
Teaching Kids How to Wrap a Present (Because Chaos Is Part of the Fun)
Start with pre-cut paper and lots of tape. Let them go wild with stickers and markers. The wonky results are honestly the best gifts you’ll ever receive.
Eco-Friendly Alternatives to Traditional Wrapping Paper
- Fabric scraps or scarves
- Old maps or sheet music
- Brown kraft paper decorated with stamps or drawings
- Reusable cloth gift bags you sew yourself (or buy from Etsy)
For more sustainable ideas, check out these trusted resources:
- Zero Waste Gift Wrapping Ideas from the EPA
- Furoshiki Wrapping Techniques from Japan’s Ministry of Environment
- Creative Reuse Ideas from Keep America Beautiful
The Psychology Behind Beautifully Wrapped Gifts
Studies actually show that people perceive beautifully wrapped gifts as more valuable—even when they contain the exact same item. It’s called “gift wrapping as a signal of thoughtfulness.” Translation: spending ten extra minutes learning how to wrap a present properly is one of the highest-ROI ways to show someone you care.
Final Thoughts: You’ve Got This
Learning how to wrap a present isn’t about perfection—it’s about turning a simple box into a moment of joy. The creases don’t have to be flawless, the bow doesn’t have to be symmetrical, but the love? That shows every single time.
Next time you’re standing there with paper, tape, and a slightly irregular box, take a deep breath. You now know exactly how to wrap a present like someone who has their life together (even if the rest of your house looks like a tornado hit it).
Go make something beautiful. Your people deserve it—and honestly? You do too.
Frequently Asked Questions About How to Wrap a Present
1. What’s the easiest way to learn how to wrap a present if I’m terrible at crafts?
Start with boxed gifts and double-sided tape. Follow the classic method above exactly once or twice, and muscle memory kicks in fast.
2. How can I wrap a present without wrapping paper?
Use fabric (furoshiki), scarves, tea towels, reusable grocery bags, or even newspaper with fun ribbons. It often looks even better than traditional paper.
3. Is there a trick to make corners look perfect when I wrap a present?
Yes—crease every fold sharply with a bone folder or your fingernail, and always fold the top flap down first before bringing the bottom flap up.
4. How much wrapping paper do I really need to wrap a present?
For a standard shirt box, a 2×3 foot piece is usually perfect. When in doubt, measure by rolling the gift across the paper—you need it to go around once plus 3 inches of overlap.
5. Can kids learn how to wrap a present too?
Absolutely! Give them pre-cut paper, kid scissors, and lots of stickers. Their versions might be crooked, but they’ll be proud—and that’s what matters.
For More Updates !! : Successknocks.com