Northern Lights Photography Tips for Beginners :
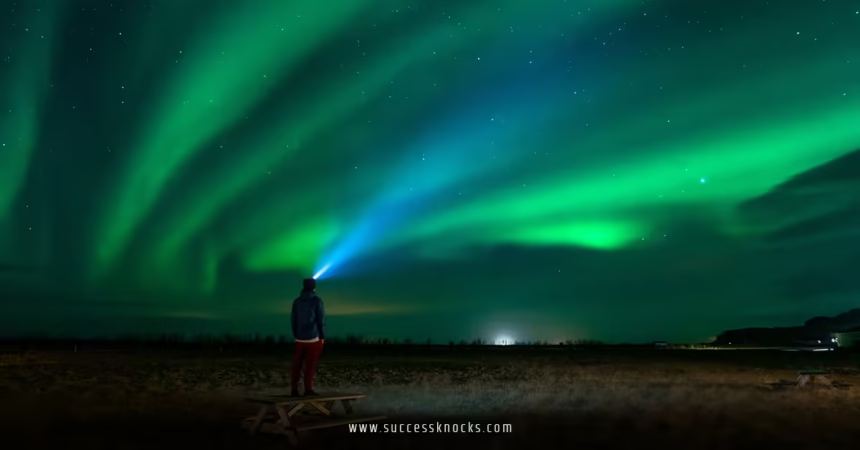
You’ve chased the aurora to the best spots to see northern lights auroras in 2026, and now the sky ignites. Green curtains ripple. Your heart races. But your phone snaps a blurry green smudge.
Frustrating, right?
That’s every beginner’s first aurora shoot. The northern lights are dimmer to the eye than they appear in photos. Cameras see more. But without the right setup, you’ll capture nothing worth framing.
I’m here to fix that. Ten years photographing auroras from Fairbanks to Finland. I’ve botched exposures, frozen batteries, and nailed shots that still hang on my wall. These tips? They’re battle-tested for absolute beginners.
No gear snobbery. We’ll start with your phone, scale to DSLRs. Let’s get you those keepers.
Why Photographing the Northern Lights Is Different
Auroras aren’t fireworks. They’re faint, constantly shifting plasma caused by solar particles slamming into Earth’s atmosphere. Your eye sees subtle glows; cameras amplify them with long exposures.
Key challenge: Light pollution, motion, and cold. One wrong setting, and poof—your shot’s gone.
But here’s the good news. Modern cameras (even phones) handle this better than ever. You just need technique.
Gear Essentials: Start Simple, Scale Up
Phone Photography (Zero Extra Cost)
Your smartphone is a solid aurora camera. iPhones and recent Androids (Pixel, Samsung Galaxy S24+) have night modes that crush faint light.
Quick Setup:
- Turn off flash. Obviously.
- Enable Night Mode or Astro Mode.
- Use a tripod or prop your phone against something stable.
- Exposure: 10–30 seconds.
- Focus: Tap the brightest star or aurora patch to lock manual focus.
Pro Move: Stack 5–10 shots in an app like NightCap (iOS) or Open Camera (Android). It reduces noise like magic.
Phones lack interchangeable lenses, but they deliver 80% of the wow factor for free.
Entry-Level Camera Kit (Under $1,000)
Camera: Canon EOS Rebel T8i or Nikon D3500. Both have excellent low-light performance.
Lens: Wide-angle, fast aperture. Sigma 14mm f/1.8 or Canon 16-35mm f/2.8. Wider = more sky, faster = better light gathering.
Tripod: Manfrotto Element MII. Sturdy, lightweight, under $150.
Remote Shutter: Or use your phone app. Prevents shake.
Extras: Extra batteries (cold kills them fast), lens warmer (condensation killer).
This kit captures pro-level shots your first night out.
Advanced Setup (If You’re Hooked)
Full-frame mirrorless like Sony A7IV + Rokinon 14mm f/2.8. Intervalometer for time-lapses. But beginners? Skip this until you’ve nailed the basics.
Camera Settings: The Money Shot Formula
Forget auto mode. Auroras demand manual control. Here’s your cheat sheet.
The Golden Settings Trio
- Aperture: f/2.8 or wider. Lets in max light.
- Shutter Speed: 10–25 seconds. Longer risks star trails; shorter misses faint auroras.
- ISO: 1600–3200. Higher amplifies light but adds noise. Test your camera.
Full Beginner Preset (adjust for conditions):
Aperture: f/2.8
Shutter: 15 seconds
ISO: 3200
White Balance: 3500K (cool tones match aurora greens/purples)
Focus: Manual infinity or live view on a bright star
Why these work: Wide aperture grabs photons. Medium shutter freezes aurora motion without blurring stars. ISO boosts signal without overwhelming noise.
Quick Adjustment Guide
| Aurora Intensity | Shutter Speed | ISO |
|---|---|---|
| Faint glow | 20–25 sec | 3200–6400 |
| Active dancing | 10–15 sec | 1600–3200 |
| Intense storm | 8–10 sec | 800–1600 |
| With foreground | 5–10 sec | 800–1600 |
Test one frame. Bright? Drop ISO or shutter. Dark? Bump them up.
Step-by-Step Shooting Plan
Step 1: Scout Your Spot (1 Hour Before Dark)
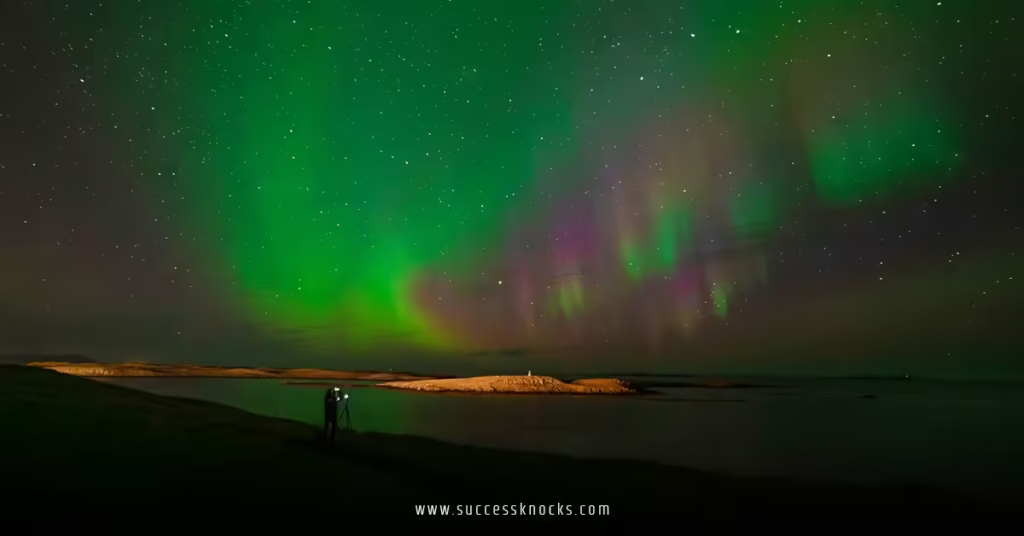
Pick a foreground—frozen lake, cabin, trees. Compose with aurora space above. Avoid light pollution. Use apps like PhotoPills or Light Pollution Map.
Step 2: Setup (30 Minutes Before Peak)
- Mount camera on tripod.
- Enable live view. Manually focus on a bright star (zoom in 10x, adjust ring until pinpoint sharp).
- Mirror lock-up (DSLRs) or electronic shutter (mirrorless) to kill vibration.
- Test shot at base settings.
Step 3: The Shoot (10 PM–2 AM)
- Check aurora forecast via NOAA or Aurora Alerts app.
- Shoot bursts: 5 frames every 2 minutes.
- Bracket exposures: ±1 stop for safety.
- Every 30 minutes: Review histograms. No clipping in highlights.
Burst tip: Auroras pulse. One frame might be dud; the next a screamer.
Step 4: Foreground Magic
Want that epic cabin-under-aurora shot?
- Light paint the foreground with a headlamp (2–5 sec exposure).
- Blend two exposures in post: bright foreground + dark sky.
Step 5: Time-Lapse Bonus
Set intervalometer: 20 sec exposure, 5 sec interval. Shoot 300+ frames (2 hours). Compile in software like LRTimelapse. Instant viral video.
Cold Weather Survival Guide
Batteries die. Lenses fog. Fingers numb. Aurora hunting is winter warfare.
Battery Hacks
- Keep spares in inner pockets (body heat = life).
- Shoot in burst mode to minimize power draw.
- Turn off image stabilization (tripod mounted).
Lens Fog Fighters
- Silica gel packets in camera bag.
- Hand warmer on lens barrel pre-shoot.
- Anti-fog spray if desperate.
Body Prep
- Merino base layers. Down parka. Face mask.
- Hot packs in mittens.
- Limit time outside: 45 min, warm up, repeat.
One frozen battery ruined my best night ever. Don’t repeat my mistake.
Post-Processing: From Good to Gallery-Worthy
Raw files are key. Shoot RAW. Here’s your workflow (Lightroom or free Darktable):
- Noise Reduction: Luminance 30–50, Color 25. Auroras are noisy—embrace denoising.
- Clarity + Texture: +20–40. Sharpens auroral rays without overcooking.
- White Balance: Slide to 3500–4500K for natural greens/purples.
- Curves: Gentle S-curve for contrast. Boost shadows slightly.
- Stacking: Photoshop auto-align/layer 5–10 identical exposures. Noise vanishes.
Phone Edits: Snapseed or Lightroom Mobile. Bump exposure +0.3, shadows +50, clarity +30. Done.
Before/after? Night and day. Processing reveals what the aurora hid.
Common Beginner Mistakes (And Fixes)
Mistake 1: Handheld Shooting
Fix: Tripod or death. Even 1-second handheld blurs everything.
Mistake 2: Auto ISO/Aperture
Fix: Manual only. Auto chokes on faint light.
Mistake 3: Shooting JPEG
Fix: RAW forever. More data = better recovery.
Mistake 4: Wrong White Balance
Fix: 3500K start. Auto turns auroras yellow.
Mistake 5: Ignoring Forecasts
Fix: No aurora = no photos. Check Kp index first.
Mistake 6: Overexposing Foregrounds
Fix: Separate exposures. Blend in post.
Mistake 7: Battery Neglect
Fix: Warm pockets. Two sets minimum.
I’ve made them all. Learn from my pain.
Key Takeaways
- Start with your phone: Night mode + tripod = instant success
- Golden settings: f/2.8, 15 sec, ISO 3200—tweak from there
- Tripod is non-negotiable; handheld ruins everything
- Shoot RAW bursts and stack for noise-free magic
- Cold kills batteries—keep them warm, shoot efficient
- Foregrounds elevate shots; light paint or blend exposures
- Post-process reveals the aurora your eye missed
- Forecast first: No geomagnetic activity = stay in bed
Conclusion
Northern lights photography isn’t about gear. It’s settings, patience, and prep. Nail the basics—wide aperture, long shutter, stable tripod—and you’ll capture frames that stun your friends.
Head to those prime viewing spots. Monitor the forecasts. Bundle up. When the aurora erupts, your camera will see the spectacle your eyes only hint at.
First trip: Phone + these tips. Second trip: Entry DSLR. By your third, you’ll be stacking time-lapses like a pro.
Grab that tripod. The sky won’t wait.
Recommended External Links for Northern Lights Articles
- NOAA Space Weather Prediction Center
Official US government source for aurora forecasts, Kp index, and geomagnetic storm alerts—essential for timing trips and shoots in 2026. - Dark Site Finder
Interactive map from DarkSky International showing light pollution levels worldwide—perfect for scouting optimal viewing spots away from city glow. - University of Alaska Fairbanks Geophysical Institute Aurora Page
(Link to their dedicated aurora research page: https://www.gi.alaska.edu/monitors/aurora-forecast)
Academic hub with live aurora cams, forecasts, and data from the epicenter of US aurora activity—gold for beginners verifying conditions in Fairbanks.
FAQ: Northern Lights Photography for Beginners
Q: Can I really photograph auroras with just my phone?
A: Absolutely. Enable Night Mode, stabilize on a tripod or rock, 15–30 sec exposures. Apps like NightCap stack shots for pro results. You’ll get keepers your first try.
Q: What’s the single most important camera setting?
A: Shutter speed. 10–25 seconds balances aurora capture with star sharpness. Too short misses the glow; too long trails stars.
Q: How do I focus in the dark?
A: Manual focus on a bright star using live view (zoom 10x). Or set to infinity if your lens has the mark. Test with a shot.
Q: Why do my aurora photos look purple or green-tinted wrong?
A: White balance. Set to 3500K manually. Auto WB freaks out on auroral colors. Fix in post if needed.
Q: Best free apps for aurora photography and forecasts?
A: Aurora Forecast or My Aurora Forecast for predictions. Open Camera (Android) or NightCap (iOS) for shooting. PhotoPills for planning compositions.