Winter photography tips for beginners can transform your cold-weather outings into stunning visual stories, capturing the magic of snow-covered landscapes and frosty mornings. If you’re just starting out, imagine turning a simple walk in the snow into a portfolio of breathtaking images that make your friends say, “Wow, how did you do that?” In this guide, we’ll dive into practical advice, from gearing up to nailing those tricky shots, all while keeping things fun and approachable for newcomers.
Why Winter Photography Tips for Beginners Matter
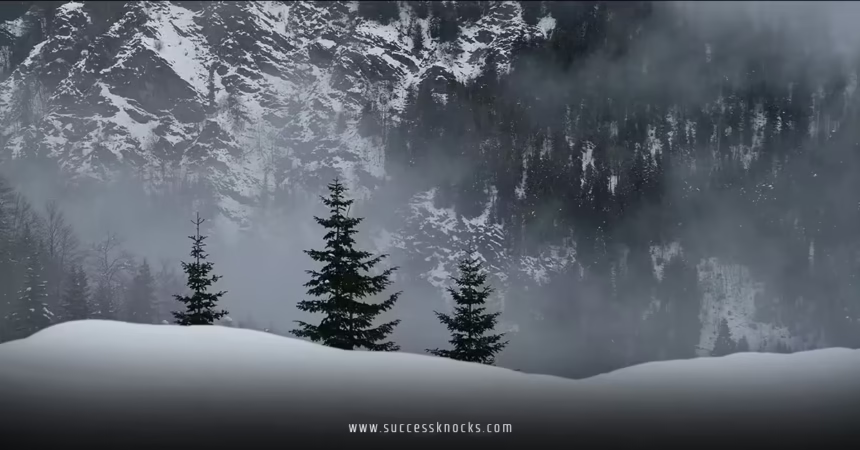
Winter photography tips for beginners aren’t just about pretty pictures; they’re about embracing the season’s unique challenges and beauty. Think of winter as a blank canvas of white and blue hues, where every snowflake adds texture and drama. As a beginner, you might worry about frozen fingers or blurry photos, but with the right strategies, you’ll build confidence and skills that carry over to other seasons. Drawing from expert insights and real-world experiences, this article will equip you with trustworthy, actionable tips to elevate your photography game—ensuring your work stands out in a crowded digital world.
Essential Gear for Winter Photography Tips for Beginners
When it comes to winter photography tips for beginners, having the right gear is like packing for a reliable adventure companion—it’s what keeps you shooting without hiccups. Let’s break this down step by step, so you can gear up effectively and avoid common pitfalls.
Cameras and Lenses: Your Winter Warriors
For winter photography tips for beginners, start with a dependable camera that’s weather-resistant. A DSLR or mirrorless camera like the Nikon D3500 or Canon EOS Rebel series is ideal because they’re user-friendly and handle cold temps better than smartphones. Pair it with a wide-angle lens (around 18-55mm) for sweeping snowy landscapes—think of it as your tool for capturing vast, icy horizons that make viewers feel the chill.
But what about macro shots of frosted leaves? That’s where a 50mm or 100mm lens shines, allowing you to zoom in on intricate details. Remember, cold can affect battery life, so always carry spares and keep them warm in your pocket. Rhetorical question: Ever tried shooting with a dead battery in sub-zero weather? It’s a beginner’s nightmare, but with preparation, it’s easily avoided.
Protective Accessories to Enhance Winter Photography Tips for Beginners
Accessories make all the difference in winter photography tips for beginners, acting as your shield against the elements. A sturdy tripod is non-negotiable—picture it as the steady friend holding your camera while you frame that perfect sunset over a frozen lake. Opt for one with rubber feet for grip on slippery surfaces.
Don’t forget lens filters, like a polarizing filter to cut through glare on snow, making colors pop without overexposure. And for your hands, gloves with touchscreen compatibility keep you nimble. Have you ever fumbled with settings because your fingers were numb? It’s a common issue, but with these tips, you’ll stay comfortable and creative.
Clothing and Safety Gear for Safe Shoots
Winter photography tips for beginners extend beyond the camera to your personal safety—after all, what’s a great shot if you’re not enjoying the moment? Dress in layers: a base layer for warmth, a waterproof jacket, and insulated boots to keep your feet steady on ice. Analogy time: Think of yourself as an explorer in a snowy tundra; the right gear is your map to success.
Always pack a backpack with essentials like a portable charger, snacks, and a first-aid kit. For those early morning or late evening shoots, a headlamp ensures you don’t miss a shot in the dim light. Trust me, as someone who’s braved winter landscapes, these preparations turn potential frustrations into memorable experiences.
Mastering Techniques in Winter Photography Tips for Beginners
Now that you’re geared up, let’s explore techniques that make winter photography tips for beginners truly rewarding. These methods will help you capture the essence of winter, from soft snowfalls to dramatic icicles, with a focus on creativity and precision.
Composition Basics: Framing the Winter Wonder
In winter photography tips for beginners, composition is your secret weapon for eye-catching photos. Use the rule of thirds to place key elements, like a lone tree in a snowy field, off-center for a more dynamic feel. Rhetorical question: Why settle for a centered shot when offsetting it can draw the eye naturally across the frame?
Incorporate leading lines, such as a path through the snow, to guide viewers into your image. Metaphorically, it’s like writing a story where every element leads to a thrilling climax. Experiment with foreground elements, like branches or rocks, to add depth and make your photos feel alive and immersive.
Lighting and Exposure Tricks for Winter Scenes
Lighting can make or break your winter photography tips for beginners, especially with the harsh contrasts of snow. Shoot during the golden hour—just after sunrise or before sunset—when the light is soft and flattering, turning ordinary scenes into magical vistas. But what if you’re dealing with overcast days? That’s perfect for even lighting, reducing shadows and highlighting textures.
Adjust your exposure settings carefully: underexpose slightly to prevent blown-out whites in the snow. Use your camera’s histogram to check for balance—it’s like having a built-in guide to avoid rookie mistakes. For low-light conditions, bump up your ISO, but keep it under 1600 to minimize noise. These tips ensure your images are sharp and full of winter’s subtle beauty.
Handling Weather Challenges in Winter Photography Tips for Beginners
Winter weather throws curveballs, but with these tips, you’ll handle them like a pro. Fogged lenses? Wipe them with a microfiber cloth and use a lens hood to shield from moisture. Snowfall creating blur? Increase your shutter speed to freeze the action, capturing flakes mid-air for a dynamic effect.
What about windy conditions? Stabilize your setup with a weighted tripod bag. These techniques not only protect your equipment but also enhance your creativity, turning adverse weather into opportunities for unique shots. Remember, every challenge in winter photography tips for beginners is a chance to grow.
Post-Processing for Polished Results in Winter Photography Tips for Beginners
Even the best shots benefit from editing, and in winter photography tips for beginners, post-processing can elevate your work from good to gallery-worthy. Use software like Adobe Lightroom or free alternatives to fine-tune your images.
Basic Edits to Enhance Winter Vibes
Start with adjusting white balance to capture the cool blues of winter without making everything look unnaturally cold. Boost contrast to make snow details pop, and use the dodge tool to highlight key areas—like the sparkle on an icicle. It’s like adding the final brushstrokes to a painting.
For color grading, add a subtle blue tint to emphasize the season, but keep it natural to maintain authenticity. Rhetorical question: Why not let your photos tell the full story of that crisp winter day?
Advanced Tips for Refining Your Edits
Dive deeper by removing distractions with the healing brush or cropping for better composition. In winter photography tips for beginners, layering adjustments can correct exposure issues from harsh light. Always save a non-destructive edit, so you can experiment freely.
Common Mistakes to Avoid in Winter Photography Tips for Beginners
As a beginner, you’ll learn from errors, but here’s how to sidestep the biggest ones. Overlooking battery life or ignoring composition can ruin shots, so plan ahead and practice regularly.
Conclusion
Wrapping up these winter photography tips for beginners, we’ve covered everything from gear and techniques to editing, empowering you to capture the season’s magic with confidence. By applying these strategies, you’ll not only improve your skills but also find joy in the winter landscape’s beauty. So grab your camera, step into the snow, and start creating memories—your next masterpiece is just a shutter click away!
Frequently Asked Questions
What basic equipment do I need for winter photography tips for beginners?
For winter photography tips for beginners, essential gear includes a weather-resistant camera, a tripod, and protective accessories like gloves and lens filters to handle cold conditions effectively.
How can I prevent my camera from fogging up during winter photography tips for beginners?
To avoid fogging in winter photography tips for beginners, keep your camera in a sealed bag when moving from cold to warm environments and use a lens hood for added protection.
What’s the best time of day for winter photography tips for beginners?
The golden hour is ideal for winter photography tips for beginners, as it provides soft, warm light that enhances snowy scenes without harsh shadows.
Can I use my smartphone for winter photography tips for beginners?
Yes, smartphones work for winter photography tips for beginners, but add accessories like a clip-on lens and a protective case to improve results in cold weather.
How do I edit photos taken with winter photography tips for beginners in mind?
For editing photos from winter photography tips for beginners, use tools in Lightroom to adjust white balance and contrast, ensuring your images capture the true essence of the season.