Wheelchair Curling Techniques for Beginners is one of the most accessible yet deeply strategic winter sports out there. No sweeping required, no sliding from a hack—just pure precision, arm strength, and ice-reading smarts from a seated position. Whether you’re new to curling entirely or transitioning from able-bodied play, mastering the basics can get you throwing stones confidently in no time.
In this beginner-friendly guide, we’ll break down the essential wheelchair curling techniques step by step. Think of it as your personal starter kit: we’ll cover setup, delivery, rotation, weight control, and practice drills that build real skills. And yes, we’ll tie in how these fundamentals shine in high-stakes events like the ongoing Milano Cortina 2026 action. Ready to hit the ice? Let’s roll.
Understanding the Basics: What Makes Wheelchair Curling Unique
First things first—wheelchair curling follows the same core rules as regular curling but with key adaptations for accessibility. Teams of four (or two in mixed doubles) slide 44-pound (20 kg) granite stones toward the “house” (that big target with concentric circles) at the far end of a 146-foot (45-meter) ice sheet. The closest stone to the button (center) scores points after all 16 stones per end.
The big differences for wheelchair players?
- No sweeping. Teammates don’t brush the ice to influence the stone’s path. Everything depends on your initial delivery: line, weight (speed), and rotation (curl).
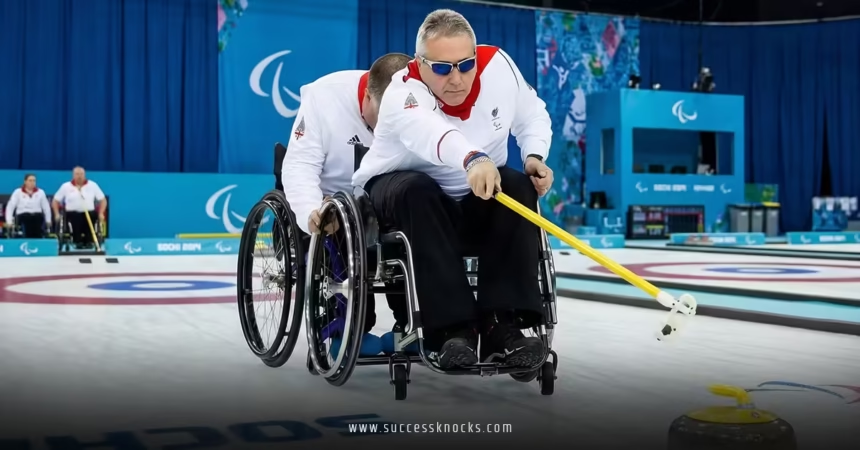
- Delivery from a stationary wheelchair. You stay seated near the hog line, using a special delivery stick instead of pushing off with your legs.
- Stabilization is key. A teammate (or “buddy”) holds your wheelchair steady from behind so it doesn’t move during the push.
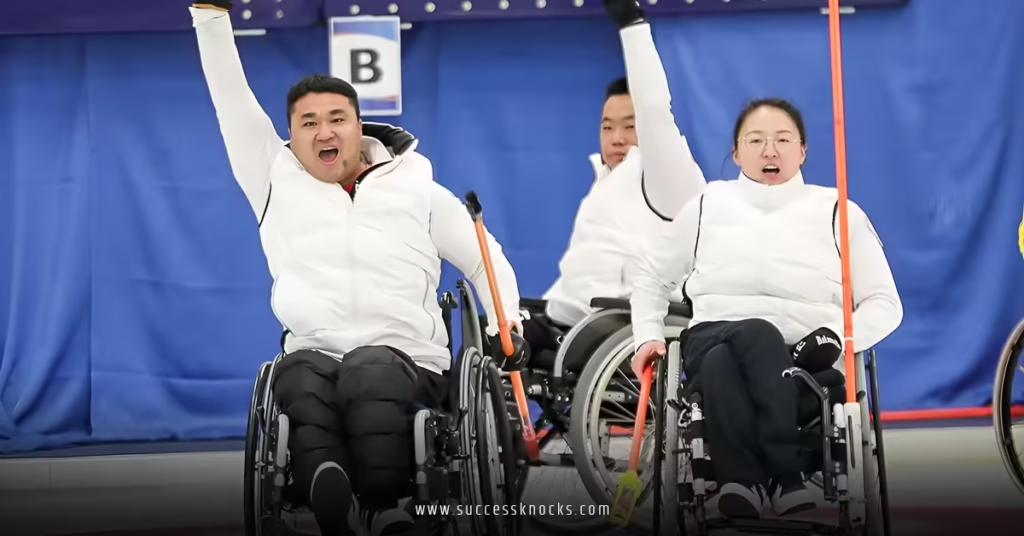
These changes make the sport incredibly inclusive—anyone with upper-body function can play—but they demand razor-sharp technique. Watch the [Milano Cortina 2026 wheelchair curling mixed doubles results] and you’ll see pros like China’s Yang Jinqiao nail perfect draws under pressure. That’s what we’re aiming for, one practice at a time.
Essential Equipment for Beginners
Before technique, gear up properly:
- Wheelchair curling delivery stick — This telescoping pole (about 5–6 feet long) has a bracket that fits over the stone handle. Clubs usually provide them for beginners.
- Stones — Same 44-pound granite beauties as in Olympic curling.
- Warm layers — Ice rinks are cold! Loose clothing helps with arm movement.
- Stabilizer/helper — A teammate or volunteer to anchor your chair.
Pro tip: Start with club sessions. Many curling facilities offer adaptive or “learn to curl” programs tailored for wheelchair users.
Step-by-Step: Wheelchair Curling Delivery Techniques for Beginners
The delivery is your everything in wheelchair curling. Nail this, and half the battle is won. Here’s the breakdown.
1. Positioning Your Wheelchair (Setup Phase)
Roll up to the delivery area (usually 6–10 feet behind the hog line for safety and release rules).
- Align squarely: Your wheelchair should face the target line directly. Shoulders square, eyes looking down the intended path.
- Feet on footrests: Both feet off the ice, securely on the footrest.
- Stone placement: Position the stone within 18 inches of the center line.
- Line up: Imagine a straight line from your delivery arm, through the stick, stone, and to the skip’s broom (target indicator) at the far end.
Many beginners struggle here. Roll up from behind the stone, set brakes, then adjust. It feels awkward at first—like parallel parking on ice—but consistency comes with reps.
2. The Buddy System: Stabilization
Your teammate stands behind, holding the wheelchair handles or wheels firmly (often pressing down on the back tires or frame). This prevents backward slide during your push.
Why it matters: Without stability, your force scatters. Good anchoring builds confidence—some players even say it feels like having an extra teammate pushing with you.
3. Grip and Stick Handling
- Slip the stick bracket over the stone handle.
- Hold the stick at belly-button level (not hip level) for better control.
- Grip firmly but relaxed—tension kills accuracy.
4. Imparting Rotation (The Curl)
Rotation makes the stone curve left or right.
- In-turn (counter-clockwise for right-handers): Turn the handle outward (palm away from body), releasing around 2:00 position back to 12:00.
- Out-turn (clockwise): Turn inward (palm toward body), releasing from 10:00 to 12:00.
Only a slight twist is needed—too much spin makes the stone hook wildly. Pros in [Milano Cortina 2026 wheelchair curling mixed doubles results] use subtle rotation to navigate guards perfectly. Start gentle; feel the ice.
5. Weight Control (How Hard to Push)
Weight = speed = distance. Too light, stone stops short; too heavy, it sails through.
- Push with a smooth, accelerating arm motion.
- Follow through straight along the line.
- Release before the hog line (about 10 feet out).
Beginners often under-push. Practice “weight drills” by aiming for different distances without rotation first.
6. Release and Follow-Through
Extend your arm fully, keep the stick low and straight. Eyes stay on the target broom. The follow-through locks in line—many curlers point their stick at the skip’s broom post-release.
Common beginner mistake: Dropping the stick or jerking. Smooth is king.
Key Shots Every Beginner Should Learn
Once delivery feels solid, add strategy:
- Draw: Gentle weight to stop in the house—your bread-and-butter shot.
- Guard: Place a stone in front to protect your own or block opponents.
- Takeout: Hit an opponent’s stone out (harder weight, precise hit).
In mixed doubles (like at Milano Cortina), shots alternate roles—skip calls, partner delivers most. Practice both!
Beginner Drills to Build Skills Fast
Hit the ice with purpose:
- Accuracy Drill — Place a cone or target in the house. Deliver 10 stones aiming dead center. Focus on line first.
- Weight Control Drill — Throw to short, medium, long distances. Mark landings to see consistency.
- Rotation Drill — Alternate in-turn/out-turn with same weight. Watch curl patterns.
- Buddy Feedback — Have your stabilizer call “line good” or “off right” during release.
- Mock Ends — Simulate 2–4 stones per “end” to practice pressure.
Start slow. Film yourself if possible—seeing your line helps hugely.
Common Mistakes and How to Fix Them
- Chair moves during push → Better anchoring or brakes.
- Stone veers off line → Check alignment; follow through straighter.
- Inconsistent weight → Count arm speed or use verbal cues (“one-and-push”).
- Over-rotating → Subtle wrist only—think “tick” not “twist.”
Patience pays off. Even top athletes tweak technique constantly.
Why Start Now? Inspiration from Milano Cortina 2026
The Paralympic spotlight on [Milano Cortina 2026 wheelchair curling mixed doubles results] shows the sport’s growth—new format, thrilling upsets, incredible precision. Beginners today have more resources: videos from World Curling Federation, adaptive clubs, and Paralympic coverage inspiring thousands.
Ready to try? Find a local club via World Curling Federation or Paralympic.org. Many offer intro sessions.
Conclusion: Your First Stone Awaits
Wheelchair curling techniques for beginners boil down to alignment, stability, smooth delivery, subtle rotation, and controlled weight. Master these, and you’ll feel the same thrill as athletes battling in [Milano Cortina 2026 wheelchair curling mixed doubles results]. It’s not about power—it’s about precision and strategy from a seated throne on ice.
Grab a stick, find a sheet, and throw your first stone. The house is waiting, and who knows? You might just catch the bug that turns beginners into competitors. Good curling!
Frequently Asked Questions (FAQs)
What is the main difference in wheelchair curling techniques compared to regular curling?
No sweeping and delivery from a stationary wheelchair using a stick—everything relies on initial line, weight, and rotation.
Do I need special equipment to start wheelchair curling techniques as a beginner?
Most clubs provide delivery sticks and stones. Your own wheelchair works fine for starters.
How do I control the curl in wheelchair curling techniques?
Use a slight wrist twist on release—10:00 to 12:00 for out-turn, 2:00 to 12:00 for in-turn. Practice subtle rotations first.
Can beginners join sessions inspired by Milano Cortina 2026 wheelchair curling mixed doubles results?
Absolutely—many clubs run adaptive programs now, boosted by Paralympic excitement.
How long does it take to learn basic wheelchair curling techniques?
Most beginners feel comfortable after 3–5 sessions focusing on delivery and weight control.